Centerpieces & Invitations
I am leaving most of this to professionals, but I've decided to do two things myself: centerpieces, and invitations. There are so many cool & easy ideas for these two things.
centerpieces
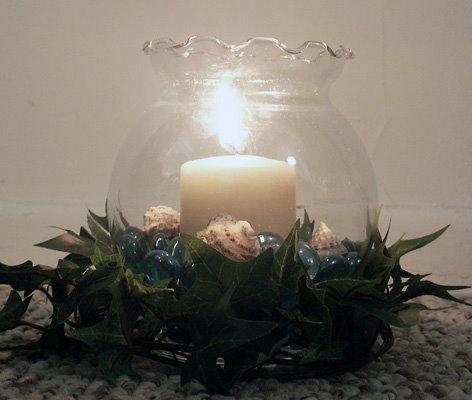
No flowers. I think this is the easiest and most invisible way to cut cost. Nobody is going to care that I have candles in the center of my tables instead of roses. Supplies for each centerpiece:
1 Ivy Bowl (4 inch opening)
1 2.5" Mini Pillar candle
1 12oz bag blue vase gems
2' silk ivy garland
seashells
I was going to do floating candles, but they require more setup time, and don't burn as long. The general idea is to mix gems & seashells in an ivy bowl, nestle a mini pillar candle in them, and then put some ivy around the outside. The whole thing costs about $5.
invitations

I've been making my own Christmas cards for quite some time, but they usually involve just drawing a picture and copying it onto a bunch of paper. These are going to be somewhat more demanding. Still, they are going to start with a picture.
I bought a hydrangea from Trader Joes for inspiration, and bought some water colors and paper from Michaels. I did some pencil studies, and then painted for the first time in several years. Proud to say, it came out pretty well on the first attempt; if you would like to spoil the surprise, check it out here. Geoff made me save the painting in our scrapbook after I scanned it, since it is now "unspeakably special."
So, scanned it into photoshop, and adjusted the colors to best match my scheme. I bought ribbon and punches from Michaels, and paper from various sources, including www.paperzone.com, which is a great website for ideas.
Tools:
Paper cutter
Rectangle punch
Corner photo punch
Ruler
Double sided tape
Glue
Exacto knife
Photo printer
Laser printer
Supplies:
1 8.5 x 5.5 piece white linen paper
1 8 x 5piece blue marble paper
1 7.5 x 4.5 piece white vellum paper
1 4.25 x 5.5 piece white linen paper
1 5.5 Bar linen envelope
Blue ribbon
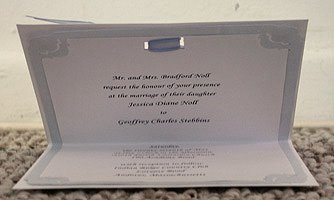
Print the hydrangea blossom on the bottom of the linen paper with photo printer. Print invitation wording onto vellum with laser. Print reply wording onto small piece of linen. Cut to size. Punch the blue paper with the photo punch and attach it to middle of the other side of the linen paper with tape and/or glue. Push corners of vellum into photo corners. May want to fasten the vellum in the middle a bit for security. Punch two rectangle holes through all three pieces on either side of flower stem, and tie the ribbon thru it. Make a bow on the flower side, as if it were a bow around the flowers. Use the ruler to fold cleanly; use knife to scour if necessary.
posted by jancola at 4:22 PM
|
0 comments
![]()

